



A loose shelf bracket, a cracked wall, a screw that spins endlessly without gripping — these aren’t just annoying setbacks. They’re the direct result of skipping steps in your fastening workflow. Whether you’re hanging a heavy mirror, framing a deck, or fixing cladding to an external wall, the difference between a job that lasts decades and one that fails within months often comes down to fastener selection, correct installation technique, and a repeatable process. This guide walks you through everything: choosing the right fastener, setting up your workspace, executing a proven installation workflow, troubleshooting common mistakes, and verifying your results for long-term reliability.
Table of Contents
- Understanding fastener types and their roles
- Essential tools and materials for efficient fastening
- Step-by-step workflow for home improvement fastener installation
- Troubleshooting common fastening issues and mistakes
- Verifying results and maximising longevity
- Our unique perspective: what most guides miss about fastening workflows
- Quality fasteners and tools for every home improvement project
- Frequently asked questions
Key Takeaways
| Point | Details |
|---|---|
| Choose the right fastener | Matching fastener type and material maximises safety and project durability. |
| Follow a repeatable workflow | Consistent preparation and installation steps prevent costly mistakes. |
| Maintain optimal edge distance | Spacing fasteners properly ensures lasting hold and reduces substrate damage. |
| Inspect and maintain regularly | Routine checks and maintenance keep fixings secure for years to come. |
Understanding fastener types and their roles
Not all fasteners are created equal, and using the wrong one for your substrate is one of the most common and costly mistakes in home improvement. Nails are fast and ideal for timber framing, flooring, and light cladding where shear strength matters more than withdrawal resistance. Screws offer superior holding power and are easier to remove, making them the go-to for cabinetry, decking, and internal fitouts. Bolts are used where structural load is a factor, typically in steel connections or heavy timber joinery. Anchors are the specialist option for concrete, masonry, and AAC (autoclaved aerated concrete) panels like Hebel.
The substrate you’re fixing into should always drive your fastener choice. Timber allows a wide range of screw and nail types, but density varies between hardwood and softwood, affecting penetration depth. Concrete and masonry demand anchors rated for the load and environment. For AAC panels, the rules are stricter: 50-75mm edge distance and embedment depth of 40-75mm are required to prevent concrete breakout, with chemical anchors recommended for close-edge or heavy-load situations.
Understanding your fastener gauge guide is equally important. Gauge refers to the diameter of the fastener shank, and getting it wrong means either a weak connection or a split substrate.
| Fastener type | Best substrate | Key advantage | Key limitation |
|---|---|---|---|
| Nail | Timber | Fast installation | Low withdrawal resistance |
| Screw | Timber, sheet material | Strong hold, removable | Slower than nailing |
| Bolt | Steel, heavy timber | High structural load | Requires through-hole access |
| Anchor | Concrete, masonry, AAC | Secure in hard substrates | Edge distance critical |
| Chemical anchor | Concrete, close edges | Maximum hold, flexible | Cure time required |
- Nails: Best for framing, flooring, and roofing with a nail gun
- Screws: Preferred for cabinetry, decking, and internal linings
- Bolts: Used in structural steel and heavy timber connections
- Anchors: Essential for concrete, brick, and AAC panel fixing
- Chemical anchors: Ideal where edge distance is tight or loads are heavy
Essential tools and materials for efficient fastening
Knowing which fastener to use is just step one. Next, you’ll need the right tools and supplies for the job. Working with the wrong tools slows you down, increases errors, and can compromise safety. A quality drill/driver is non-negotiable — variable torque settings let you control depth and avoid over-driving. A hammer is still essential for nail-based work, particularly when a pneumatic nailer isn’t available. A spirit level, measuring tape, and pencil are the basics that prevent misalignment before a single fastener goes in.

Personal protective equipment (PPE) matters too. Safety glasses protect against flying debris when drilling into masonry or concrete. Hearing protection is important when using pneumatic tools. Gloves reduce fatigue during extended sessions.
For quality and durability, cutting corners on fasteners is a false economy. Cheap fasteners corrode, strip, and fail under load. Branded products from trusted suppliers give you consistent dimensions, correct metallurgy, and reliable performance. Our installation expert tips go deeper on matching fastener grade to environment, particularly for coastal or high-humidity applications where corrosion resistance is critical.
Pro Tip: Before starting any job, lay out all your tools and fasteners in order of use. Group fasteners by type in labelled containers. This simple habit cuts fumbling time and reduces the chance of grabbing the wrong size mid-job.
| Task | Core tools | Recommended fasteners |
|---|---|---|
| Timber framing | Nail gun, hammer, tape measure | Framing nails, joist hanger nails |
| Decking | Drill/driver, countersink bit | Decking screws, stainless steel |
| Concrete fixing | Hammer drill, anchor setter | Masonry anchors, chemical anchors |
| Cabinet installation | Drill/driver, level | Cabinet screws, wall anchors |
| Cladding | Nail gun, level, chalk line | Cladding nails, stainless ring shank |
- Drill/driver: Variable torque, cordless for mobility
- Hammer drill: Required for masonry and concrete anchoring
- Spirit level: Prevents misaligned fixings from the start
- Countersink bit: Ensures flush screw heads in timber and sheet material
- Torque limiter: Prevents over-tightening in sensitive substrates
Step-by-step workflow for home improvement fastener installation
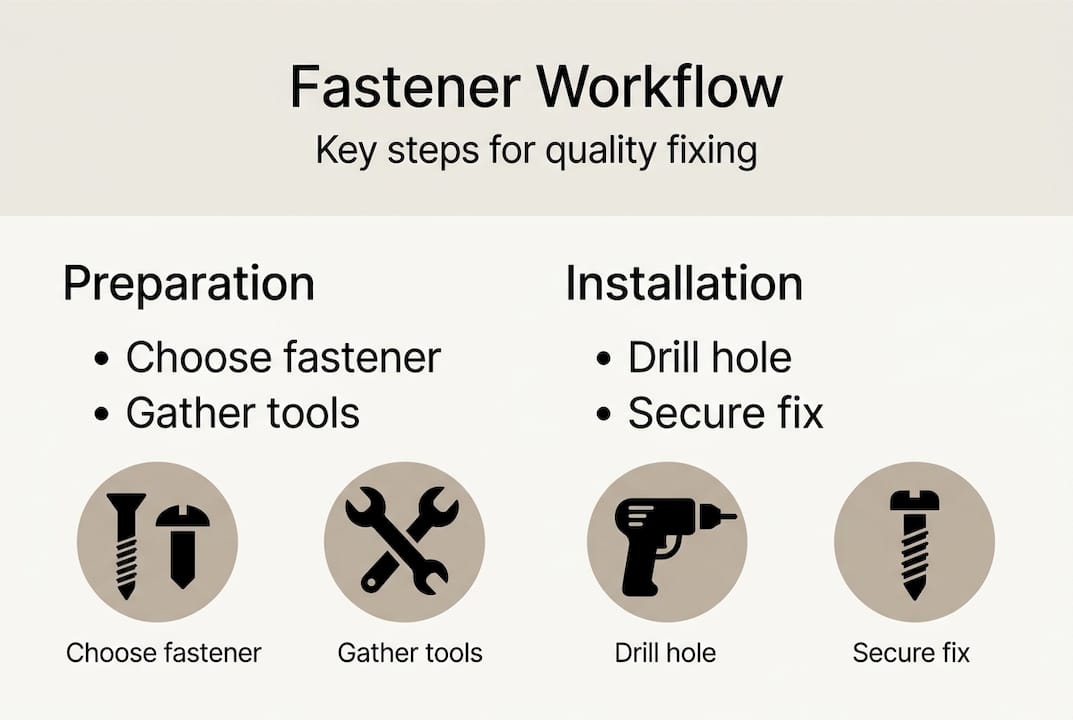
With your tools and materials sorted, you’re ready to follow the workflow that streamlines installation. A repeatable process removes guesswork and keeps quality consistent across every project.
- Measure and mark: Use a tape measure and pencil to mark fastener positions accurately. Double-check spacing requirements for your specific application.
- Select fasteners for the substrate: Confirm fastener type, length, and gauge match the material you’re fixing into and the load it will carry.
- Drill pilot holes where required: Timber, sheet material, and AAC panels all benefit from pilot holes to prevent splitting and ensure straight entry.
- Check edge distances: For anchors in concrete or AAC, minimum 100mm from panel edge for Hebel AAC panels, and 50-75mm edge distance for anchors in concrete to avoid breakout.
- Install fasteners at correct torque: Use a torque-controlled driver. Tighten until snug, then stop. Over-tightening strips threads and damages substrates.
- Check alignment: Use a level after each fixing point to confirm the element is plumb or level before proceeding.
- Perform an initial tug test: Gently apply load in the direction the fastener will resist. Any movement means the fixing needs to be checked.
A fastener installed at the wrong edge distance or depth can fail without warning. Always verify embedment and edge clearance before applying load.
Our fastener workflow tips cover application-specific techniques for decking, cladding, and structural fixing in more detail.
Pro Tip: When working with AAC panels, never use a standard impact driver at full power. The brittle nature of the material means over-torquing can fracture the panel face. Use a drill/driver with torque set to medium and finish by hand if needed.
Troubleshooting common fastening issues and mistakes
Even with careful preparation, mistakes can happen. Here’s how to handle them quickly and efficiently.
The most common signs of a failed or failing fastener include visible movement in the fixed element, surface cracking around the fixing point, or a fastener that spins without tightening. Each symptom points to a specific cause.
- Spinning screw: The pilot hole is too large, or the thread has stripped the substrate. Remove the fastener, fill the hole with timber filler or a timber plug, allow to cure, and re-drill.
- Wall cracking around anchor: Edge distance was insufficient, or the anchor was over-torqued. This is a structural concern. Remove the anchor, assess the damage, and relocate the fixing point.
- Loose fixing after load: The fastener was too short, or embedment depth was inadequate. Proper embedment depth and edge distance prevent this from occurring in the first place.
- Corrosion around fixing point: Wrong fastener material for the environment. Replace with a stainless steel or hot-dipped galvanised option.
- Fastener head sitting proud: Countersink depth was insufficient. Use a countersink bit to deepen the recess before re-driving.
When a fastener has failed in concrete or masonry, patching and re-using the same hole is rarely reliable. Relocate the fixing point by at least 75mm.
For a full breakdown of common errors and their fixes, our guide on troubleshooting fastener problems is a practical reference for both DIYers and tradies.
Knowing when to replace versus patch is straightforward: if the substrate is intact and the fastener simply stripped, patching works. If the substrate is cracked, spalled, or the fastener pulled through, replacement at a new location is the only safe option.
Verifying results and maximising longevity
After the final fastener is in, it’s crucial to ensure the job is safe and will last for years. Verification isn’t just a final step — it’s how you protect your work and avoid callbacks.
- Visual inspection: Check every fixing point for flush fastener heads, no surface cracking, and correct alignment of the installed element.
- Load test: Apply a controlled force in the direction the fastener resists. For wall-mounted items, push horizontally. For floor fixings, apply downward pressure.
- Check for movement: Any perceptible movement under load means the fixing is inadequate. Identify the cause before proceeding.
- Document your work: For structural or load-bearing installations, photograph fixing points and note fastener type, size, and embedment depth. This is invaluable for future maintenance or modifications.
- Schedule routine checks: Set a reminder to inspect fixings every 12 months, particularly in outdoor or high-humidity environments where corrosion can develop unseen.
Pro Tip: For heavy-load applications near edges, chemical anchors for close edges deliver significantly higher holding power than mechanical anchors and reduce the risk of substrate cracking over time.
For guidance on selecting the right load-bearing fasteners for structural applications, we’ve put together a detailed resource covering rated capacities and installation requirements across common Australian substrates.
Routine maintenance is simple but often skipped. A quick check for corrosion, loosening, or surface movement around fixing points takes minutes and can prevent expensive repairs. Outdoor fixings, particularly in coastal areas, deserve annual inspection as a minimum.
Our unique perspective: what most guides miss about fastening workflows
Most fastening guides focus on product selection and stop there. What they miss is that the workflow itself is where projects succeed or fail. We’ve seen experienced tradies use the right fastener in the wrong sequence — drilling pilot holes after marking but before checking edge distances, for example — and end up with fixings that technically look correct but carry real structural risk.
The hidden cost of rushing or skipping steps isn’t just a loose bracket. It’s the remediation work, the material waste, and in worst cases, the liability. Cheap fasteners compound this. A fastener that costs half the price but corrodes in two years or strips under load costs far more in the long run than a quality product installed correctly the first time.
Our workflow efficiency tips reflect what we’ve learned from supplying tradies and DIYers across Australia: the best results come from treating the workflow as seriously as the product choice. A methodical approach isn’t slow — it’s actually faster, because you’re not fixing mistakes.
Quality fasteners and tools for every home improvement project
Ready to put this workflow into practice? At Aussie Nails and Fasteners Warehouse, we stock everything you need to execute a clean, reliable fastening job from start to finish.
Browse our corrugated fasteners for timber joinery, explore our full tools collection including drills, drivers, and pneumatic nailers, or shop our screws range for decking, cabinetry, and structural applications. Every product we carry is selected for performance and durability, so you can follow the workflow with confidence. Whether you’re a weekend DIYer or a full-time tradie, the right supplies make every step faster and every result more reliable.
Frequently asked questions
What is the safest distance from the edge when installing fasteners?
For most anchors in concrete or masonry, allow 50-75mm edge distance to prevent breakout and ensure a stable hold. For AAC panels like Hebel, maintain a minimum of 100mm from the panel edge.
How do I avoid over-tightening fasteners?
Use a torque-controlled driver and stop as soon as resistance increases. For sensitive substrates like AAC, monitor resistance carefully and avoid using an impact driver at full power for final tightening.
When should I use chemical anchors?
Choose chemical anchors when fixing near edges or carrying heavy loads, as chemical anchors for heavy loads deliver maximum holding power and significantly reduce the risk of substrate cracking.
What’s a sign that my fastener has failed?
Loose fittings, visible movement under load, or surface cracking around the fixing point all indicate the fastener may have failed and needs to be inspected or replaced immediately.
Recommended
- Fastener installation guide: expert tips for Australian projects – Aussie Nails and Fasteners Warehouse
- How to troubleshoot fastening issues: 5 practical steps – Aussie Nails and Fasteners Warehouse
- Load-bearing fasteners guide for Australian construction – Aussie Nails and Fasteners Warehouse
- Understanding fastener gauge: a practical guide for construction – Aussie Nails and Fasteners Warehouse
- Streamline construction document workflow for efficiency – BIM.Supply
- Structural Plans Workflow: Step-by-Step Success Guide - Florida Licensed Engineers