

TL;DR:
- Correct screw selection depends on material type, standards, and environmental conditions.
- Using the right tools, fasteners, and verifying compliance prevents costly failures.
- Proper planning and standard knowledge ensure safe, durable Australian construction projects.
Reaching into your toolbox and grabbing a screw that looks about right is one of the costliest habits on any job site. Wrong thread pitch, wrong corrosion rating, wrong length — and suddenly you’re pulling apart finished work, sourcing replacements, and explaining delays to a client or watching your weekend project fall apart. Australian conditions add another layer of complexity: humidity, bushfire zones, coastal salt air, and strict building codes all influence which fasteners are genuinely fit for purpose. This guide walks you through a clear, practical process for selecting the right screw every time, from understanding local standards to troubleshooting installation errors before they become expensive failures.
Table of Contents
- Understand materials and standards before starting
- Gather the right tools, materials, and fasteners
- Step-by-step screw selection process for common projects
- Troubleshooting screw selection: common mistakes and fixes
- Why most screw selection advice misses the mark
- Get your screws and fasteners from experts
- Frequently asked questions
Key Takeaways
| Point | Details |
|---|---|
| Know your materials | Timber, masonry, and metal each require specific screws and compliance checks. |
| Follow Australian standards | Adhering to AS 1720.1, AS 3566, and others ensures both safety and legality. |
| Gather tools and certificates | Before starting, collect all tools, materials, and supplier compliance docs. |
| Use a stepwise process | Match your screw selection to project type with a systematic approach for best results. |
Understand materials and standards before starting
Every reliable screw selection decision begins with two questions: what are you fixing into, and what does Australian legislation require? These two factors shape every choice that follows. Timber framing, masonry block, steel sheeting, and fibre cement board all behave differently under load, and the fastener that performs brilliantly in one application can fail catastrophically in another.
Why material matters
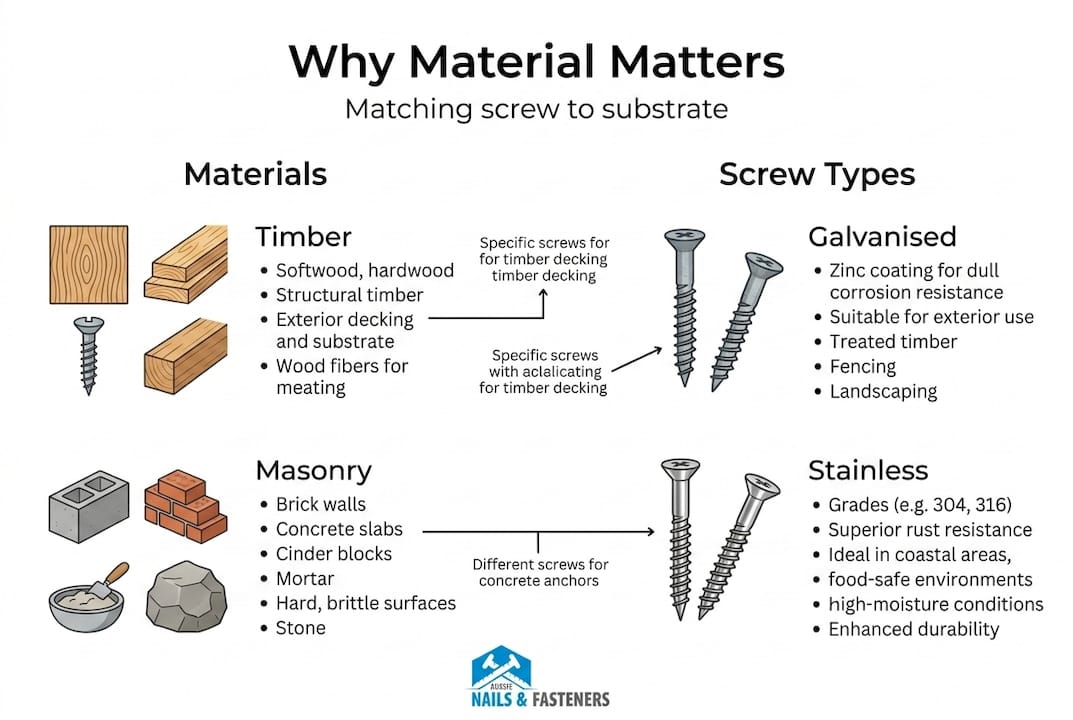
Timber is forgiving with the right screw but will split, crush, or creep under an oversized or incorrectly spaced fastener. Masonry is brittle and requires fasteners that manage tension and shear without creating concrete breakout. Metal substrates need fine-threaded, hardened fasteners that grip without stripping. Choosing a general-purpose screw and hoping for the best is how roof sheets pull free in a storm or deck balusters loosen after a single season.
The three broad material categories to match your screw choice against are:
- Timber (softwood, hardwood, engineered timber, LVL): requires structural timber screws, coach screws, or batten screws; thread pitch and penetration depth matter enormously
- Masonry and concrete (brick, blockwork, poured slab): requires masonry screws, concrete anchors, or plugs with screws; failure modes include pullout and concrete spalling
- Metal (steel purlins, aluminium cladding, stainless fittings): requires self-drilling or self-tapping screws; corrosion resistance is non-negotiable
Australian standards you need to know
The AS 1720.1 timber connections standard governs screw selection for timber structures, covering spacings, embedment depths, and load capacities. AS 3566 sets out performance requirements for self-drilling screws used in construction. AS 5216 addresses the design of post-installed and cast-in fastenings in concrete. AS/NZS 1252 covers high-strength structural bolts for steel connections. Familiarising yourself with the relevant standard before you buy a single box of screws keeps your project compliant and your warranty intact.
| Standard | Application | Key requirement |
|---|---|---|
| AS 1720.1 | Structural timber | Spacing, embedding depth, capacity |
| AS 3566 | Self-drilling screws | Corrosion class (Class 1 to 4) |
| AS 5216 | Concrete fastenings | Pullout, breakout, steel failure |
| AS/NZS 1252 | High-strength bolts | Proof load, tensile strength |
Understanding our screw types guide alongside these standards gives you a working foundation before you step foot in a hardware aisle.
Pro Tip: If your project falls under the National Construction Code (NCC), treating Australian standards as optional is not a shortcut. It is a liability. Build compliance in at the specification stage, not the inspection stage.
Corrosion classification deserves special attention for Australian projects. Coastal zones within 100 metres of breaking surf typically require Class 4 stainless steel or hot-dipped galvanised fasteners. Understanding fastener grades before purchasing prevents the expensive experience of watching your deck fixings rust through in eighteen months.
When choosing stainless steel for projects in corrosive environments, always verify the grade (304 vs 316) against your specific exposure conditions. Grade 316 is the right call for marine environments; Grade 304 handles general outdoor use in non-coastal areas.
The essential fastener types for Australian construction span a wide range, and understanding their differences before you start a project saves both time and money.
Gather the right tools, materials, and fasteners
Knowing the standards is only half the job. Having the right equipment and materials on hand before you start means fewer trips to the supplier and no interrupted workflow mid-project. A well-prepared tradesperson or enthusiastic DIYer with a complete setup will always outperform someone who improvises on the fly.
Essential tools for screw installation
The quality of your installation is directly tied to the quality of your tools. A worn driver bit causes cam-out, which damages screw heads and reduces pull-through resistance. An underpowered drill in hardwood leads to broken screws or insufficiently driven fixings.
Your core toolkit should include:
- Drill and impact driver: An 18V cordless impact driver handles most construction screws efficiently; use a drill for pre-drilling pilot holes
- Driver bits: Matched to your screw head (Torx, Phillips, hex) and regularly replaced
- Measuring tape and combination square: For marking spacing accurately
- Safety glasses and hearing protection: Non-negotiable on any working site
- Depth gauge or drill stop collar: To control penetration depth consistently, especially in composite or thin-sheet materials
- Torque-controlled driver setting: Prevents overdriving and material crushing
Screws for each major material type
Matching your fastener to the substrate is the single most impactful decision you make during the selection process. Here is a practical reference for the most common Australian project types:
| Project type | Recommended screw type | Notes |
|---|---|---|
| Deck framing (treated pine) | Galvanised structural screw | Class 3 minimum; Class 4 coastal |
| Hardwood decking | Stainless steel countersunk | Pre-drill required |
| Brick/block wall fixing | Masonry screw or anchor | Check embedment depth per AS 5216 |
| Steel purlin or girt | Self-drilling hex head | Match drill point to steel thickness |
| Plasterboard to steel | Self-drilling bugle head | Fine thread; do not overtighten |
| Fibre cement sheet | Fibre cement screw | Countersinking head prevents blow-out |
For projects that carry load-bearing fasteners, always source screws that come with documented load ratings. A box of screws without a specification sheet attached is a risk in any structural application.
The importance of supplier compliance certificates
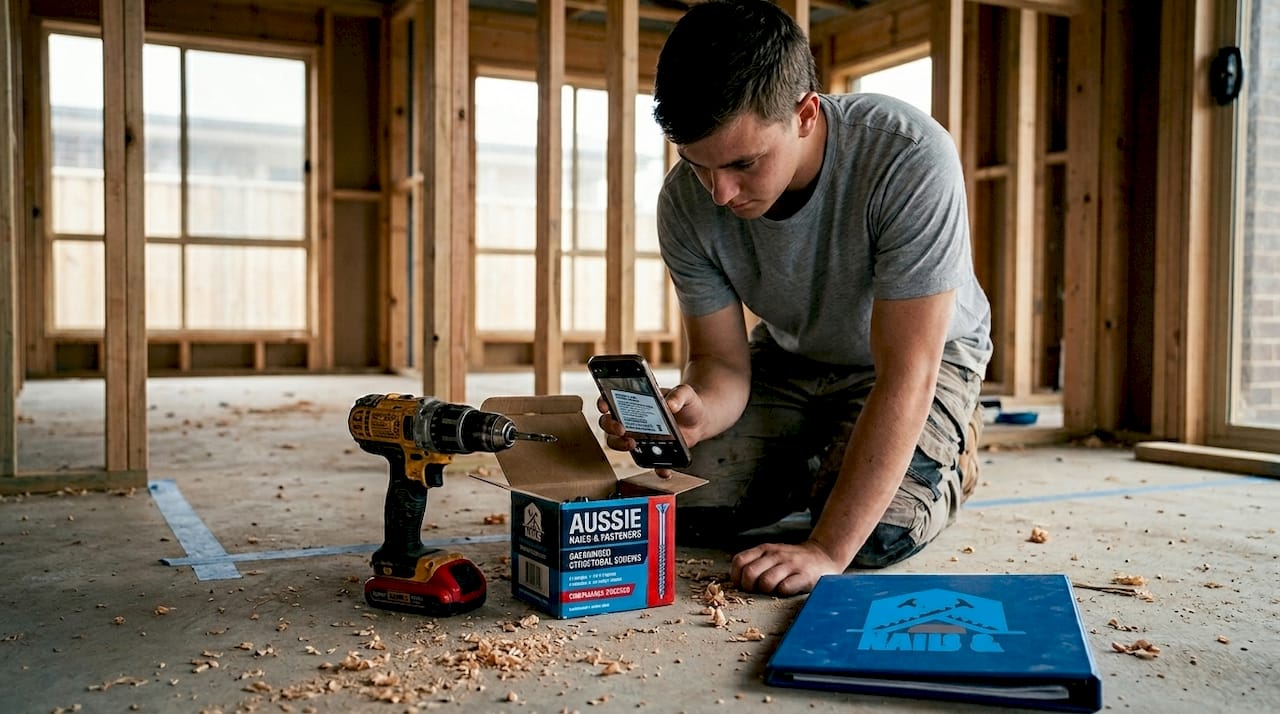
This is where many DIYers and even some trades make a costly assumption: they trust the packaging without verifying the documentation. Reputable Australian suppliers provide compliance certificates that confirm the batch meets the relevant standard. Always ask for it. Keep it in your project documentation. If a building inspector or engineer asks for evidence of compliance, a box with a logo on it is not sufficient — the certificate is.
Pro Tip: Create a simple project folder (even just a manila envelope or a phone photo album) that stores your screw specification sheets and compliance certificates for every major material. It takes five minutes and can prevent months of dispute resolution.
Step-by-step screw selection process for common projects
Now the practical work begins. Here is a clear process for each major material category you are likely to encounter on a typical Australian residential or commercial project.
Timber projects
Following AS 1720.1 timber connections, structural timber screws require minimum end and edge distances of 5 to 8 times the screw diameter (referred to as 5-8D) to prevent splitting under load. Shortcutting on spacing is one of the most common on-site errors, and it dramatically reduces joint strength.
- Identify timber species and whether it is classified as softwood or hardwood
- Calculate required screw diameter and length based on member thickness and load type
- Mark all screw positions using a spacing guide to ensure compliance with 5-8D edge distances
- Pre-drill pilot holes in hardwood species such as spotted gum, jarrah, or blackbutt
- Drive screws using an impact driver set to the correct torque — flush, not proud, not countersunk beyond specification
- Check for splitting, cracking, or crushing of the timber surface
Review your woodworking fastener types before starting any timber job to confirm you have the correct head style and thread form for your specific timber type.
Concrete and masonry projects
According to AS 5216:2018, fastening into concrete requires accounting for three distinct failure modes: steel failure, pullout failure, and concrete cone breakout. Most product failures on site happen because only one of these was considered during selection.
- Confirm concrete grade or masonry type and the expected load direction (tension, shear, or combined)
- Select anchor type: masonry screw for light fixings, chemical anchor or expansion bolt for structural loads
- Drill hole to the manufacturer’s specified diameter using a hammer drill with a carbide bit
- Clean the hole of dust and debris before installing the anchor
- Install to the specified torque or embedment depth — do not exceed or under-install
- Allow cure time for chemical anchors before loading (typically 20 to 60 minutes depending on temperature)
Metal and steel projects
Self-drilling screws remove the need for a separate pilot hole in steel substrates, but the drill point must match the steel thickness. Using a drill point designed for light gauge on structural steel simply means a broken point and a wasted fastener.
- Determine base metal thickness in millimetres
- Select the correct drill point number: #1 for up to 0.8mm, #3 for up to 4.0mm, #5 for up to 12.5mm
- Choose corrosion class based on environment (Class 3 or 4 for coastal and industrial)
- Use a variable speed drill at moderate speed to start the point without wandering
- Apply consistent pressure until the thread engages fully with the substrate
Understanding screw thread type strength is critical here. Coarse threads suit softer materials; fine threads are for metal and dense hardwood.
Pro Tip: When driving self-drilling screws into steel purlins for roofing, use a depth-limiting attachment on your driver. Overdriving compresses the neoprene washer unevenly, which compromises weatherproofing and load transfer simultaneously.
Troubleshooting screw selection: common mistakes and fixes
Even experienced tradespeople make screw selection errors. The difference between a professional and a beginner is recognising them quickly and knowing the fix.
The most common mistakes on Australian job sites
- Wrong thread pitch for the material: Coarse thread in thin steel strips the hole immediately; fine thread in softwood lacks withdrawal resistance
- Insufficient length: The screw provides grip only through the threaded section; inadequate embedment reduces pull-out capacity below design requirements
- Ignoring corrosion class: Bright zinc screws in treated pine (CCA or ACQ treated timber) accelerate corrosion because the treatment chemicals react with standard zinc coatings
- Skipping the pre-drill in hardwood: Splitting at the end grain destroys the structural integrity of the connection before any load is ever applied
- Using generic screws for structural applications: A general-purpose screw has no load rating. Substituting it for a rated structural screw is a code breach and a safety issue.
Always prioritise NCC and AS 1720.1 compliance for structural timber screws, and always verify supplier certificates. A compliant fastener protects the structure, the project, and the professional who installed it.
How to check correct installation
After installation, carry out a simple visual and mechanical check:
- Screw head sits flush or at the specified countersink depth, not angled or cammed-out
- No cracking or splitting visible in timber within two screw diameters of the fixing
- Screw turns without play when the connected member is manually loaded (for non-structural checks)
- Washer or plate sits flat with consistent contact across its full face
Knowing what quality fastener standards look like in practice helps you verify both the product you purchased and the result you achieved.
When it comes to external applications such as balustrading and handrails, railing material selection reinforces why getting both the fastener and the base material right matters for long-term safety and aesthetics.
Pro Tip: Before accepting a delivery of structural screws on site, check the batch markings on the packaging against the specification sheet. Non-compliant product occasionally enters the supply chain, and a five-second check at delivery prevents a much larger problem at inspection.
Why most screw selection advice misses the mark
Here is the uncomfortable reality: most guides, catalogue recommendations, and even in-store advice treat screw selection as a product decision rather than a design decision. They ask “which screw looks right for this?” rather than “what load, environment, and standard governs this connection?”
We have seen projects where the selected screw was technically the right type but the wrong corrosion class for the environment, or the correct class but installed at incorrect spacing. Both outcomes fail inspection. Both cost money. The advice that prevents these failures comes from reading and applying the actual standard, not from picking the option with the best packaging.
The real lesson from years of supplying trades across Australia is that every project has unique site conditions. Coastal is not inland. Hardwood is not softwood. A heavy duty fasteners specification for a commercial deck is not interchangeable with a residential balcony, even if they look identical on paper. Invest ten minutes in specifying correctly before you open a single box, and the rest of the project runs cleanly.
Get your screws and fasteners from experts
Once you know exactly what you need, sourcing from a supplier who stocks compliant, documented product makes the final step straightforward.
At Aussie Nails and Fasteners Warehouse, we stock an extensive screw selection range covering structural timber screws, masonry anchors, self-drilling metal screws, and specialty fasteners for every Australian project type. All our products come from trusted brands including JITOOL, APlus, and Supco, with compliance documentation available. We also supply the quality tools you need to install them correctly, from impact drivers to depth-limiting attachments. Whether you are a tradesperson running a busy site or a DIY enthusiast building your first deck, we have the product range, the technical knowledge, and the competitive pricing to support you from start to finish.
Frequently asked questions
What is the most important Australian standard for timber screws?
AS 1720.1 governs timber connections, including screw types, spacings, and load capacities, making it the primary standard for any structural timber screw application in Australia.
Do I need to pre-drill for screws in hardwood?
Yes, pre-drilling is strongly recommended for hardwoods to prevent splitting at end and edge grain, as specified under AS 1720.1 spacing requirements of 5 to 8 times the screw diameter.
What type of screw should I use for concrete or masonry?
Use masonry screws, concrete anchors, or plugs with screws, and select the anchor based on the expected failure mode — the AS 5216 standard for concrete fastenings outlines the design requirements for pullout, steel failure, and breakout.
How can I verify if a screw or fastener is compliant for my project?
Request a compliance certificate from your supplier that confirms the product meets the relevant Australian standard; packaging alone is not sufficient evidence of NCC and AS 1720.1 compliance for structural applications.
Recommended
- Why screw thread type matters: strength in every build – Aussie Nails and Fasteners Warehouse
- Screw types explained: Complete guide for Australian builders – Aussie Nails and Fasteners Warehouse
- How to install screws for strong, secure results every time – Aussie Nails and Fasteners Warehouse
- Top construction fastening tips for secure, lasting builds – Aussie Nails and Fasteners Warehouse